Step 1: Create new App Integration
In this step, you will integrate Casebook as an application in LastPass to establish a trust relationship between the applications.
To add a new application in LastPass
- Navigate to the Applications page and select Add App in the upper left-hand corner.
-3.png?width=688&name=image%20(5)-3.png)
- Select Add an Unlisted App.

- Name this application Casebook. Then select Continue.
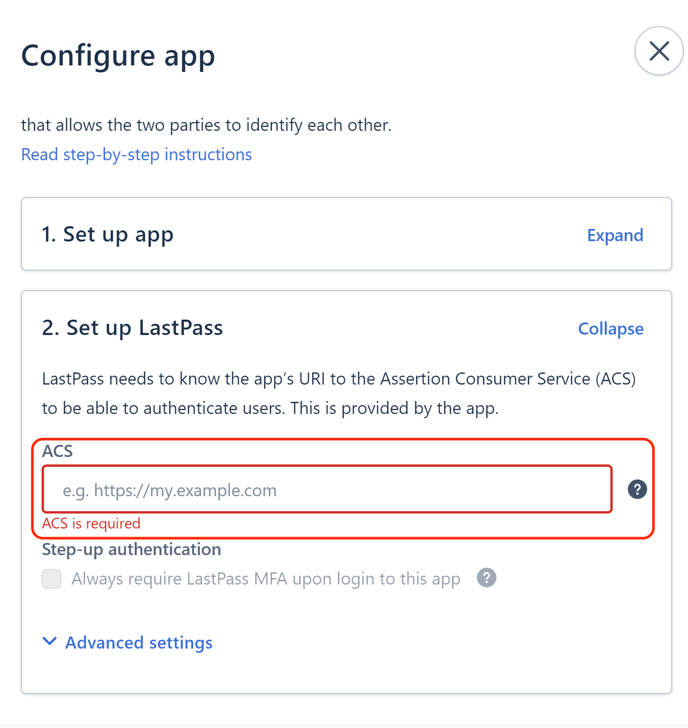
- Expand Step 1 - Set Up App in LastPass and download Metadata File.
-4.png?width=445&name=image%20(5)-4.png)
- In Casebook, copy the Reply URL under Step 2.
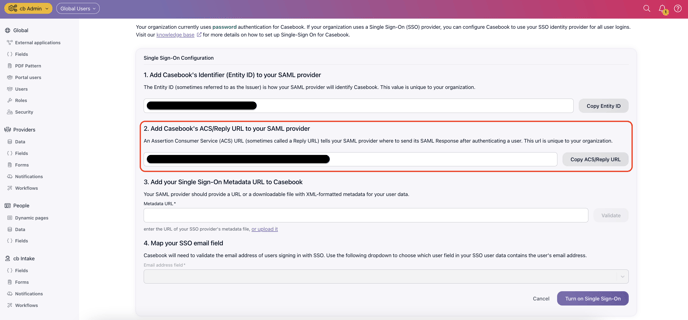
- Back in LastPass, in the ACS field, enter the Reply URL you copied previously from Casebook, as shown below.
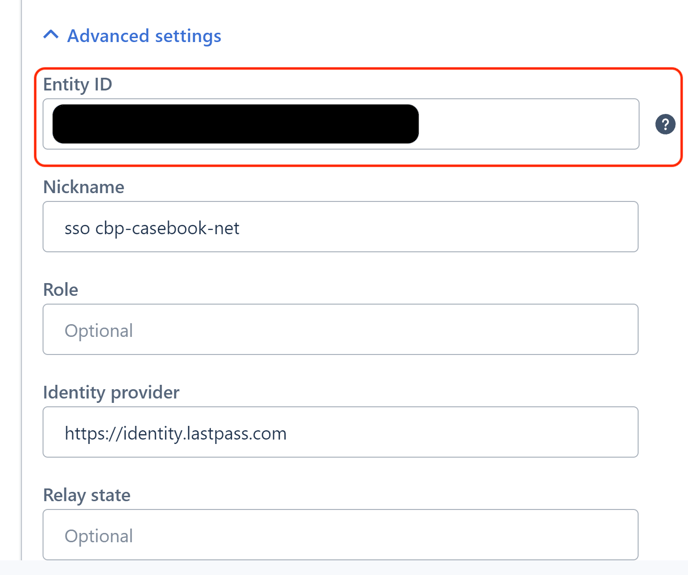
- Select Advanced Settings.
- In Casebook, copy the Identifier Entity ID under Step 1.
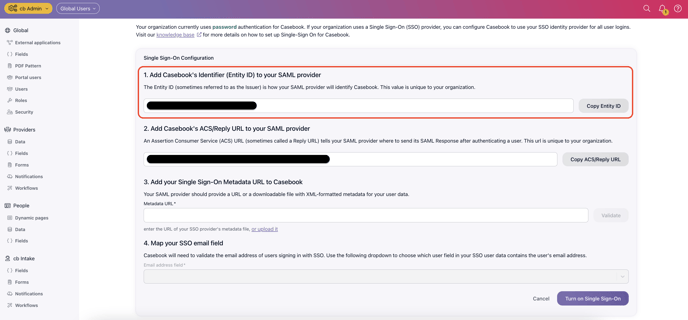
- Back in LastPass, in the Entity ID field, enter the Identifier Entity ID you copied previously from Casebook, as shown below. Please note that the Entity ID will be pre-populated with 'Casebook', delete this value before pasting the ID.
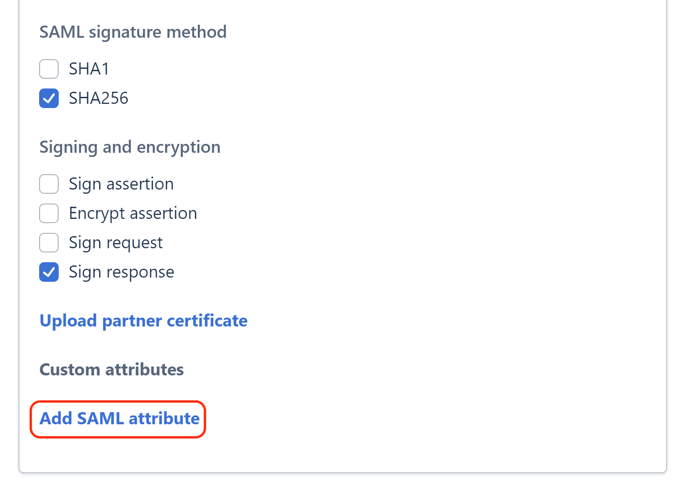
- Change the SAML Signature Method to SHA256. Change Signing and Encryption to Sign Response.
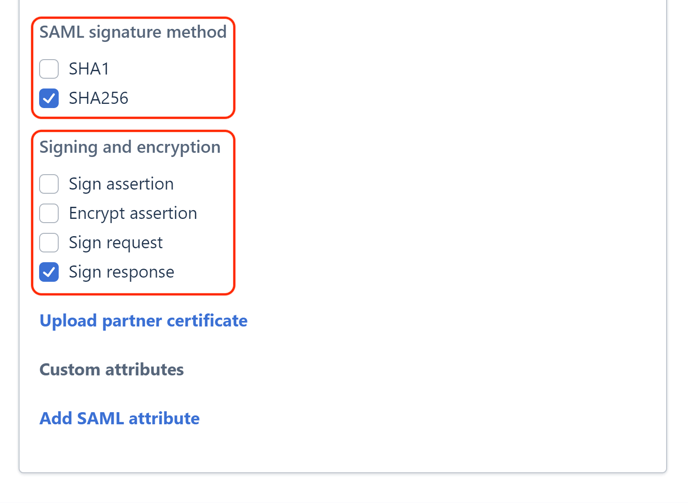
- Select Add SAML Attribute.
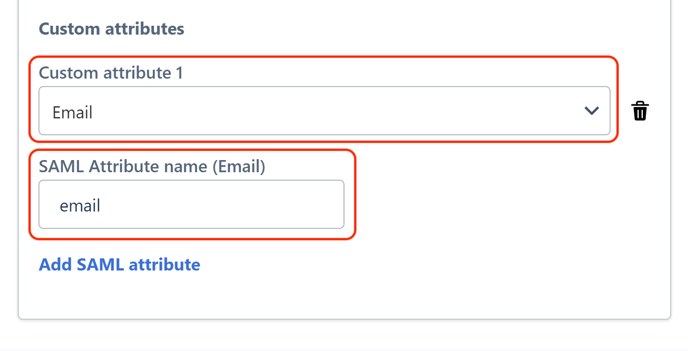
- Change Custom Attribute 1 to Email and enter in email in the SAML Attribute Name (Email) field.
- Select Save and Assign Users.
Step 2: Assign Users to Application
- Select Assign Other Users and Groups.
.png?width=445&name=image%20(6).png)
- Select either the Users, Groups, or Roles that you want to give access to Casebook.
- Select Save & Continue.
.png?width=411&name=image%20(7).png)
Step 3: Add Metadata URL to Casebook
- Upload the Metadata File (previously downloaded) into Step 3 Casebook Metadata.
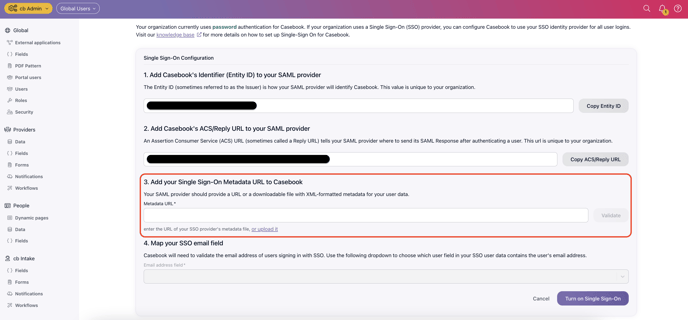
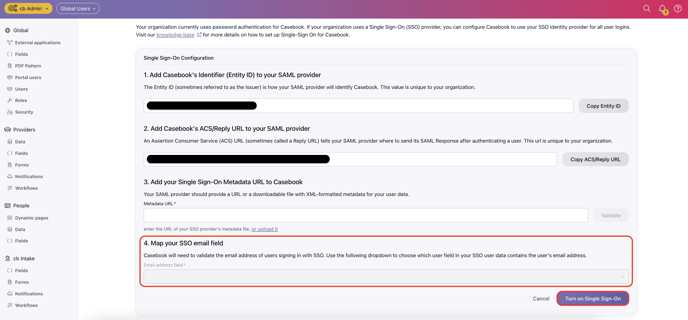
- Type "email" into Step 4 Map Your SSO Email Field in Casebook.
- Select Turn on Single Sign On.