This article will go over how to add a Calculated Field to a table and will provide some common formulas.
Casebook allows you to define new fields in the data set, named calculated fields. These fields are created by using expressions similar to what you may find in Sheets or Excel (formulas). An expression can be a combination of existing field(s), constant values and:
-
simple math calculations and other functions that are not predefined.
There are two types of calculated fields:
When do I use a pre-calculated field vs a post-calculated field?
We've found that most organizations benefit from the use of pre-calculated fields. Pre-calculated fields are best used when you want the calculation to be isolated, i.e. calculated on each row of your data individually (is this field empty? is this value bigger than x?). Post-calculated fields are best used when you want the calculation to be aggregate, i.e. calculated on the whole of your data (changing duration to be shown in hours).
Pre-Calculated Fields
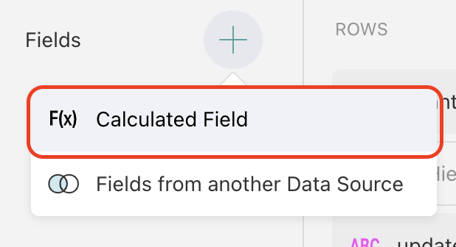
- From the Report Builder, Select the + Icon in Fields Section
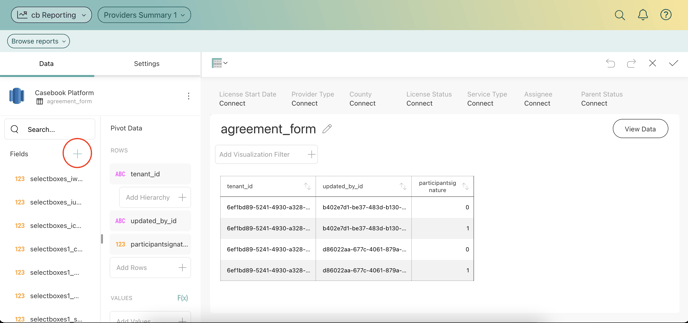
- Select Calculated Field
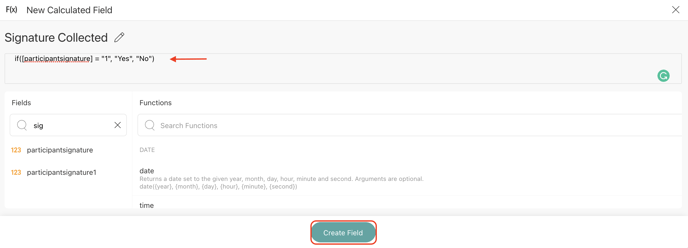
- Name the Calculated Field and select Done
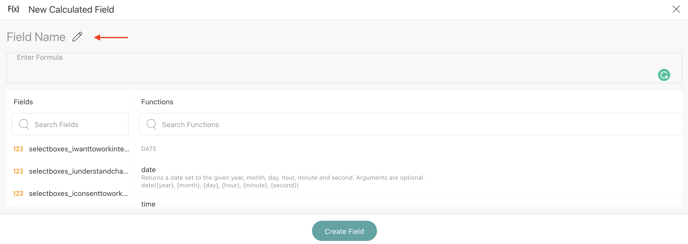
- Enter in a formula or copy and paste the formula that you wish to use and select Create Field
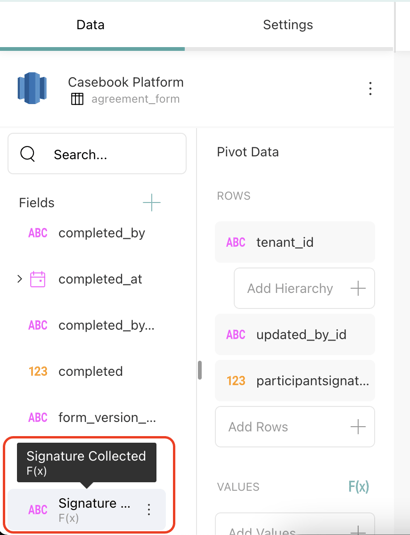
- The new Calculated Field will populate at the bottom of the Fields list on the left-hand side of the Report Builder
Post-Calculated Fields
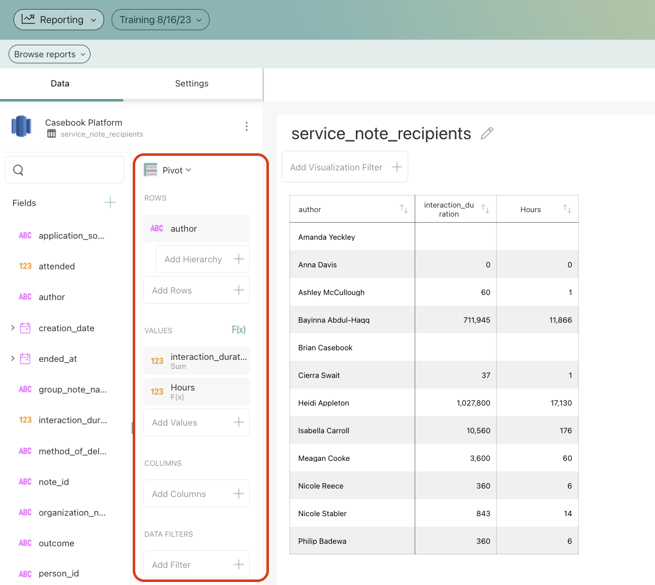
Post-calculated fields can be created when working with Pivot tables and other visualizations, which execute an aggregation on the data fields in the report builder. Post-calculated fields are always built by applying a formula on already summarized values.
To create a post-calculated field you will need to:
-
Create a visualization by adding fields from your data source in the report builder.
-
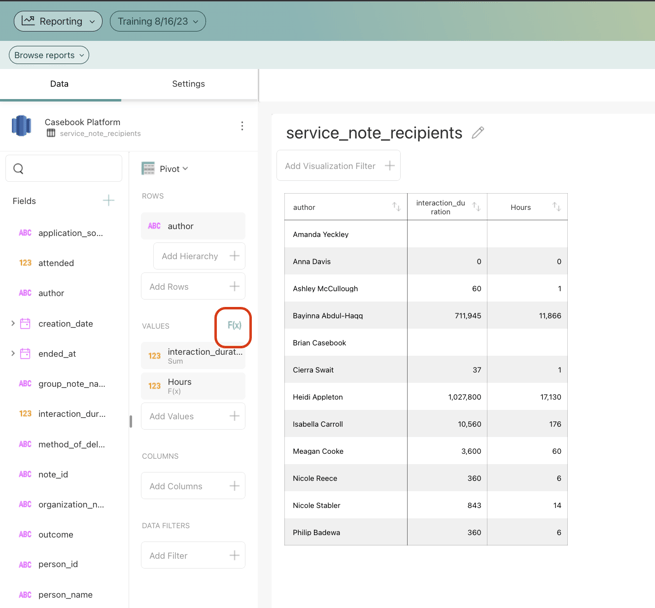
Click the F(x) button next to Values to open the New Calculated Field screen:
-
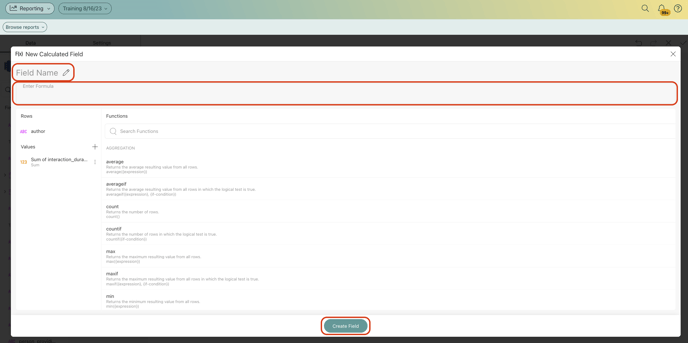
Give a name to your new calculated field and apply a formula to the summarized value(s).
Using the Predefined Functions
For both pre-calculated and post-calculated fields, you can use one of the available functions within Reporting:
-
Aggregation: AVERAGE, AVERAGEIF, COUNT, COUNTIF, MAX, MAXIF, MIN, MINIF.
-
Date: DATE, DATEVALUE, DAY, FORMATDATE, FQUARTER, FYEAR, HOUR, MILLISECOND, MINUTE, MONTH, MONTHNAME, MONTHSHORTNAME, NOW, QUARTER, SECOND, TIME, TODAY, WEEKDAY, WEEKNUM, YEAR, CURRENTTIMEZONE, DATEDIFF. APPLYTIMEZONE.
-
Information: EMPTY, ISEMPTY.
-
Logic: AND, FALSE, IF, NOT, OR, TRUE.
-
Lookup & Reference: PREVIOUS, ROW.
-
Math: ABS, EXP, LOG, LOG10, MOD, RAND, RANDBETWEEN, SIGN, SQRT, TRUNC.
-
String: CONCATENATE, FIND, LEN, LOWER, MID, REPLACE, SORTINTERVAL, TRIM, UPPER.
What to consider when using the Casebook functions
-
Text strings should be included between quotation marks. Examples include locale ("en") and date formats ("dd/mm/yyyy").
-
Fields included in your formula should be included between square brackets. Examples include [person_id], [gender] and [address]
To see these steps in action, check out the video below: