.png?width=1286&height=255&name=logo-raspberry%20(1).png)
Follow these steps to send a form to an external client:
- Navigate to the report, and go to the Tasks section.
- From the Tasks section, click on the + icon on the right.
- Fill out the required information:
- Task name
- Due Date
- Assigned to:
- Type in the name of the person you want to fill out the form
- Select the person's name from the options.
- Note: If the person record does not have an email address, then you'll receive an error when adding the task. You will need to make changes to the person record, then refresh the intake page for those changes to apply.
- Select form
- Select Add task to save. Alternatively, you can click on Cancel to discard.
Note: Only forms available to Access users will be available as an option when selecting a form. If the form is not available to Access users, it will not be displayed in the options list.
Using Client Portal?
If your organization has the Client Portal included in your Casebook subscription, and your client has accepted their invitation, assigned forms appear in the Client Portal alongside their other assigned tasks. Clients can complete forms, upload documents, and track their work from a single dashboard. For more information on Client Portal, please click here.
If your organization is not using Client Portal, clients will continue to receive and complete forms using the standard external task workflow described in this article.
After you've created the task, the assignee will receive an email with a link to the form and steps on how to access and complete the form.
The assigner/creator of the task will receive a notification once the form has been completed.
Reviewing the Completed Form: Navigate to the intake, and click on the Review button
- Navigate to the intake, and click on the Review button

- Scroll all the way down to the bottom of the screen and make your selections

- If the form needs changes or is incomplete, you can click on Decline. You'll be asked to make a note to the assignee/submitter on why the form was not accepted. The assignee will receive an email with your note and information on how to resubmit the form.
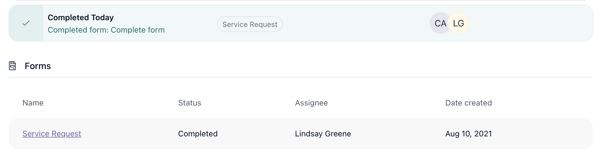
- If the form is complete and no further changes are needed, click on the Accept button. The task will be marked as complete, and the completed form will be added to the Forms section.
Note: Only the assigning user can accept forms and mark the task as complete.