SSO Configuration: Google
This article will walk through how to set up Casebook Single Sign On with Google.
Step 1: Add New Application
In this step, you will add Casebook as an application in Google to establish a trust relationship between the applications.
To add a new application in Google
- Navigate to the Apps Overview page.
- Select Web and Mobile Apps.
-
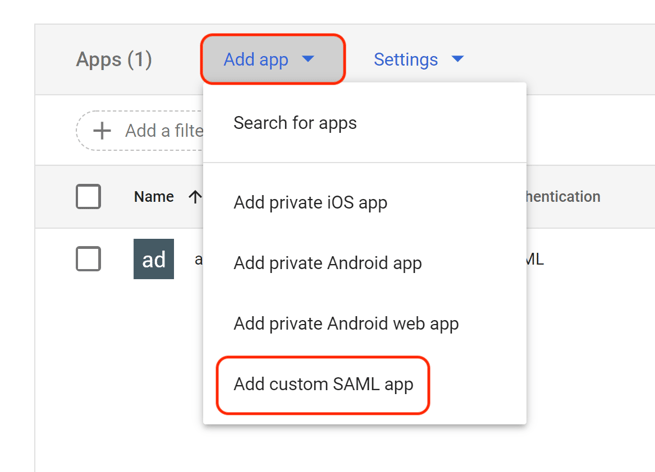
Select Add App, then select Add Custom SALM App.
- Enter App Name, then select Continue.
.png?width=688&name=image%20(5).png)
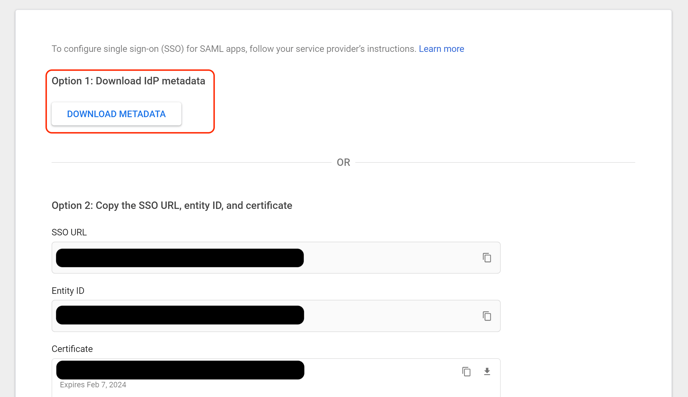
- Download the IdP Metadata file. Keep this handy for a later step. Then select Continue.
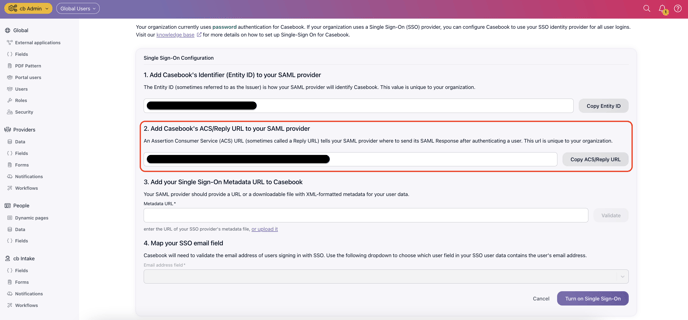
- In Casebook, copy the Identifier Entity ID under Step 2.
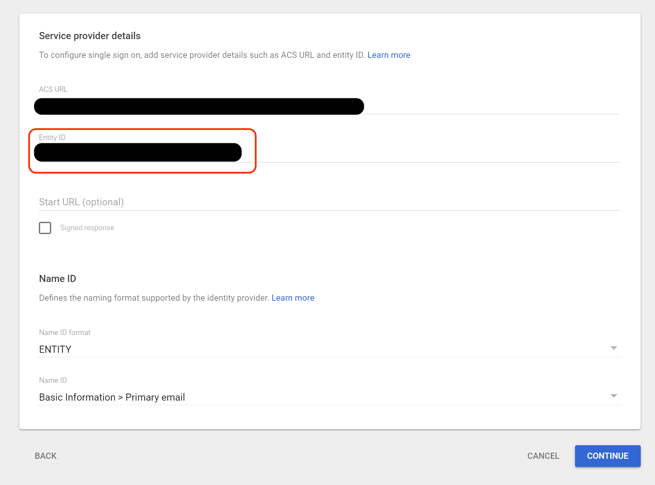
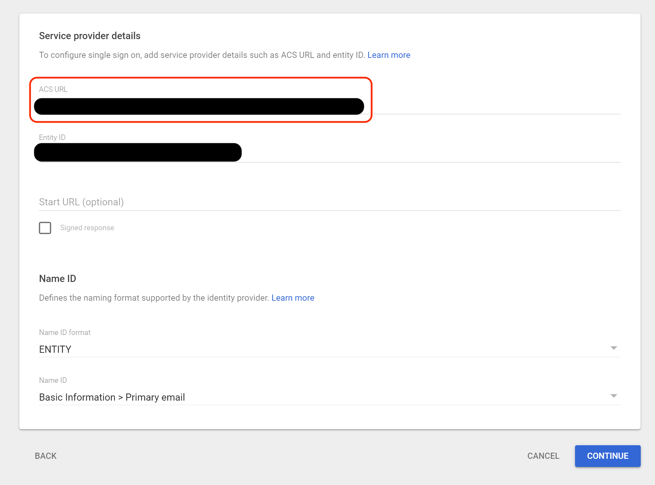
- Back in Google, in the Entity ID field, paste the Identifier Entity ID you copied previously from Casebook, as shown below.
- In Casebook, copy the Reply URL under Step 1.
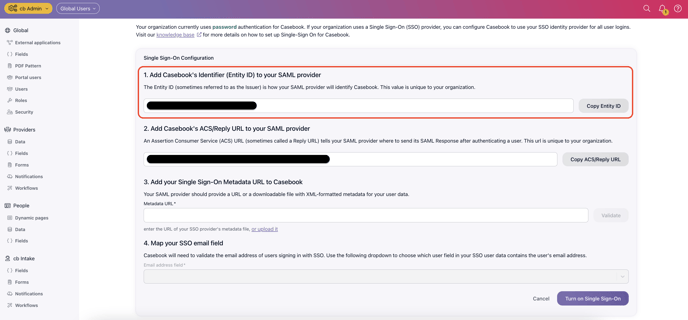
- Back in Google, in the ACS URL field, enter the Reply URL you copied previously from Casebook, as shown below.
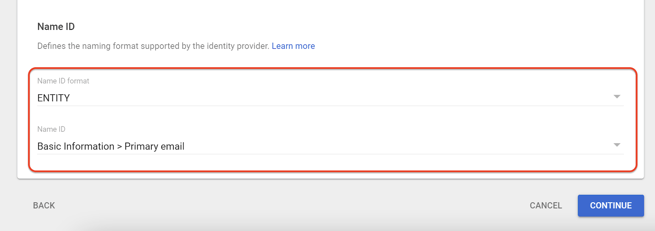
- Change the Name ID Format to ENTITY and Name ID to Basic Information > Primary Email. Then select Continue.
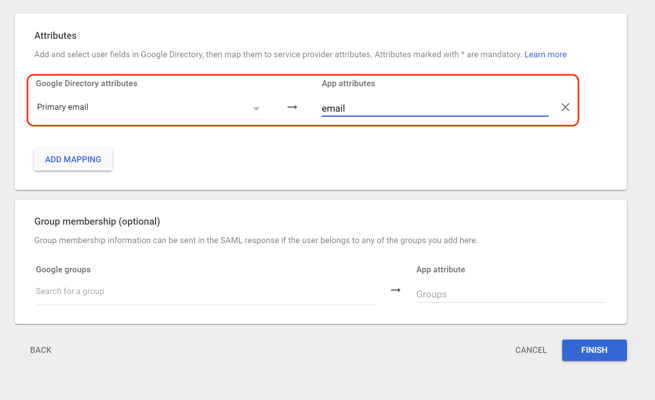
- Select Add Mapping. Then change Google Directory Attributes to Primary Email and App Attributes to (type in) email. Then select Finish.
Step 2: Assign Users to Application
- Select the carrot icon to the left of User Access.
-1.png?width=688&name=image%20(5)-1.png)
- Please ensure the service is turned ON, as shown below, for the users who need access to this application.
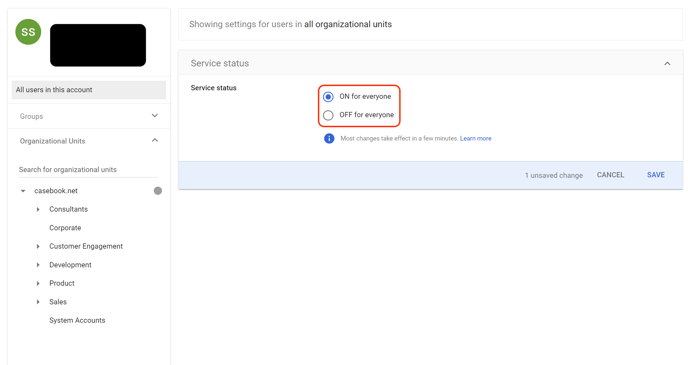
Note: For additional support, please see the Turn On Your SAML App section on this page.
Step 3: Add Metadata URL to Casebook
- Upload the IdP Metadata URL (previously downloaded) into Step 3 Casebook Metadata.
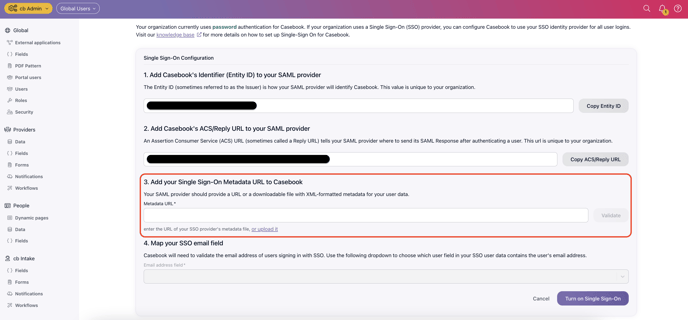
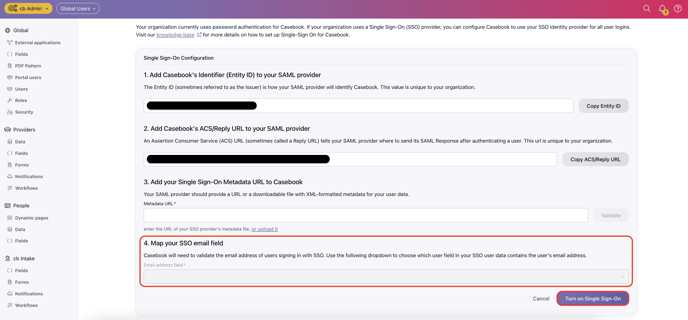
- Type "email" into Step 4 Map Your SSO Email Field in Casebook.
- Select Turn on Single Sign On.
Please note that the Single Sign On integration might show the error below, if so, it can take up to 72 hours for changes to take effect. Please see this Google Support article for more details. -2.png?width=560&name=image%20(5)-2.png)
.png?width=1286&height=255&name=logo-raspberry%20(1).png)