Step 1: Add Casebook as an enterprise application in Azure AD
In this step, you will add Casebook as an application in Azure AD to establish a trust relationship between the applications.
To add a new application in Azure AD
- Log in to the Azure Portal.
- In the Azure Services section, choose Azure Active Directory.
- In the left sidebar, choose Enterprise applications.
- Choose New application.
- On the Browse Azure AD Gallery page, choose Create your own application.
- Under What’s the name of your app?, enter a name for your application, Casebook, and select Integrate any other application you don’t find in the gallery (Non-gallery), as shown below. Then select Create.

It will take a few moments for the application to be created in Azure AD. You should be redirected to the Overview page for the newly added application.
Note: Occasionally, this step can result in a Not Found error, even though Azure AD has successfully created a new application. If that happens, in Azure AD navigate back to Enterprise applications and search for your application by name.
To set up Single Sign-on using SAML
- On the Getting started page, in the Set up single sign on tile, choose Get started, as shown below.

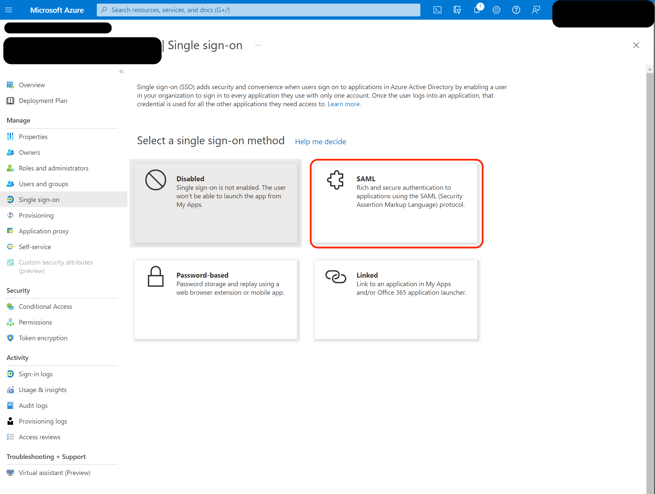
- On the next screen, select SAML.
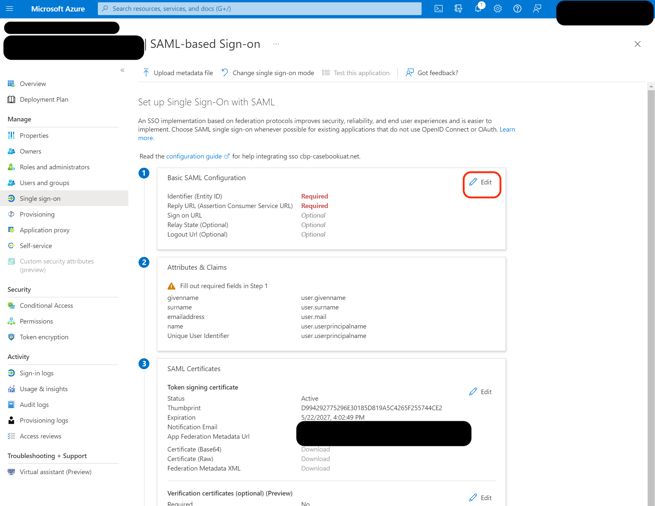
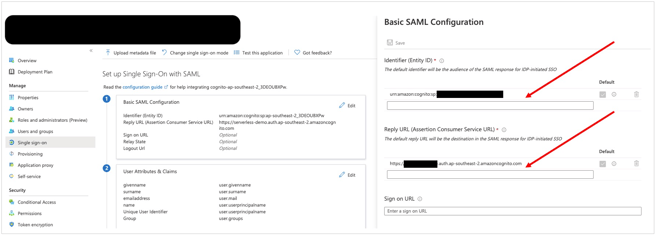
- In the middle pane under Set up Single Sign-On with SAML, in the Basic SAML Configuration section, select the edit icon.
- In Casebook, copy the Identifier Entity ID under Step 1.
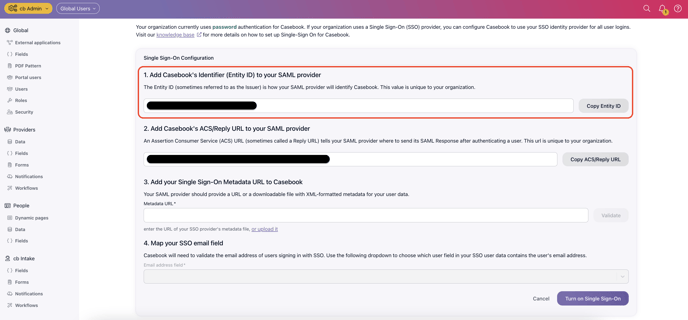
- Back in Azure AD, in the right pane under Basic SAML Configuration, replace the default Identifier ID (Entity ID) with the Identifier (Entity ID) you copied previously from Casebook.
- In Casebook, copy the Reply URL under Step 2.
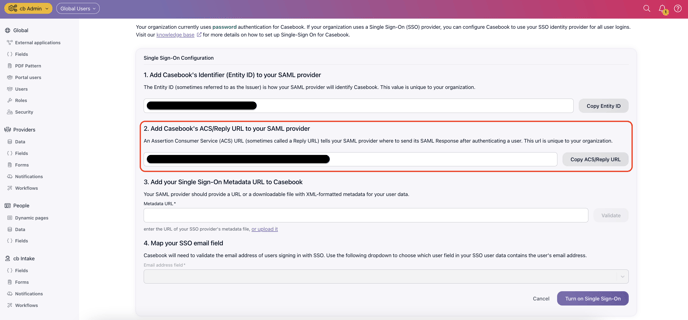
- Back in Azure AD, in the Reply URL field, enter the Reply URL you copied previously from Casebook, as shown below. Select Save.
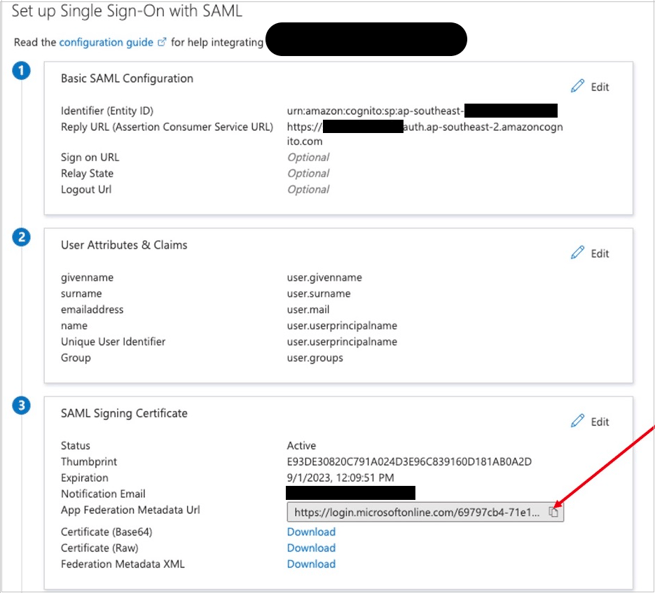
- Scroll down to the SAML Signing Certificate section, and copy the App Federation Metadata Url by choosing the copy into clipboard icon (highlighted with red arrow below). Keep this URL in a text editor, as you’ll need it in the next step.
Step 2: Add your Single-Sign-On Metadata URL to Casebook
- Paste the App Federation Metadata Url that you previously copied into Step 3 in Casebook and select Validate.
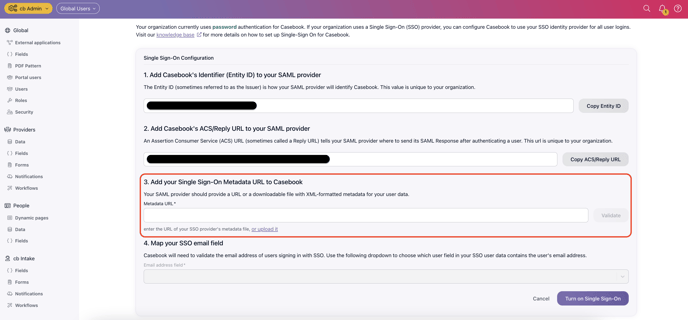
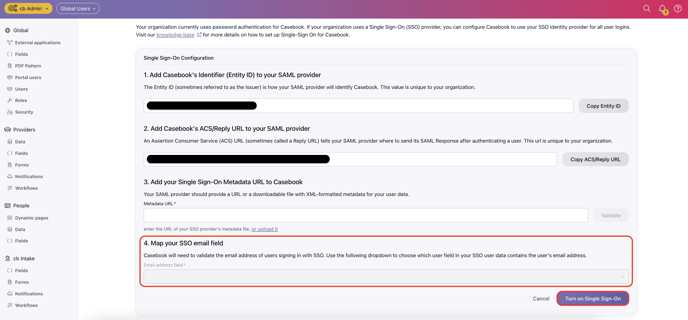
- Type "email" into Step 4 Map Your SSO Email Field in Casebook.
- Select Turn on Single Sign On.
Note: Assign Users to Casebook in Azure AD.
You will need to assign users to this application in Azure AD. If a user is not assigned to Casebook, they will see the following error message as they try to log-in. .png?width=688&name=image%20(3).png)
Optional
If you want to further restrict the Casebook app such that only a single group of users is allowed to consent, navigate to the Casebook, Calendar and Email Integration application in Azure Portal, then select Properties. You can toggle the assignment required to Yes. Once this is set, you can manage those users on the Users and Groups page.
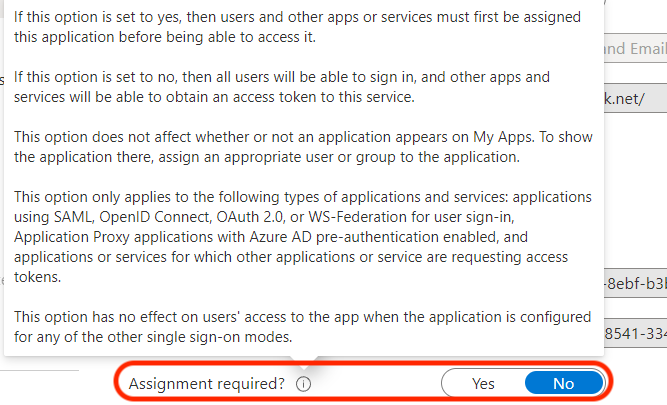
You can turn access options on or off for your users through the Self Service tab. These options can indicate if a user needs permission to access the application. -2.png?width=688&height=392&name=image%20(7)-2.png)