Step 1: Create new App Integration
In this step, you will integrate Casebook as an application in Okta to establish a trust relationship between the applications.
To add a new application in Okta
-
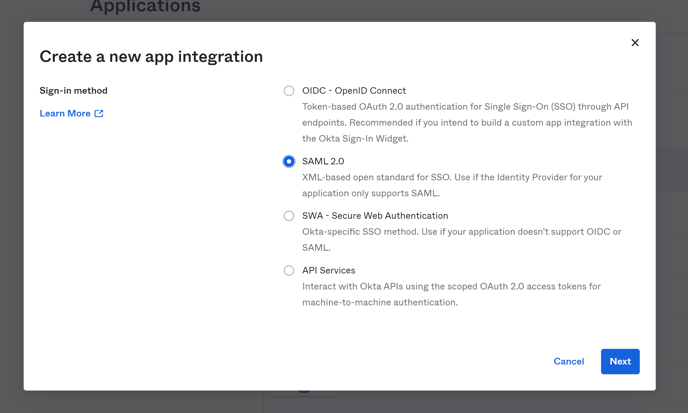
Select Create new App Integration.
- Select SAML 2.0, then select Next.
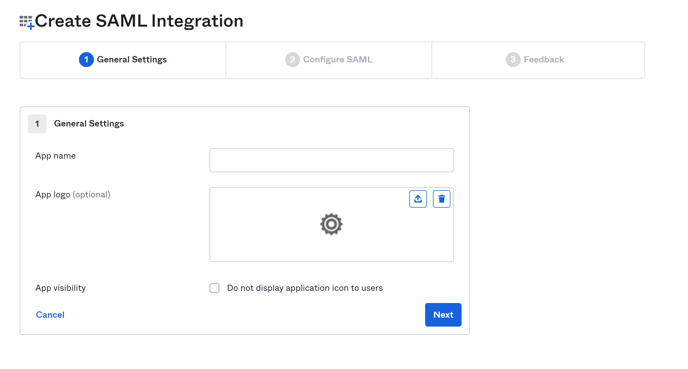
- Enter App Name, then select Next. (Logo is optional)
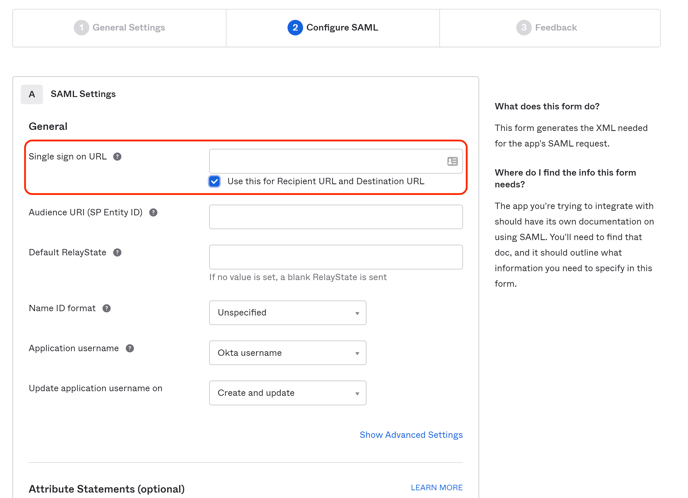
- In Casebook, copy the Reply URL under Step 2.
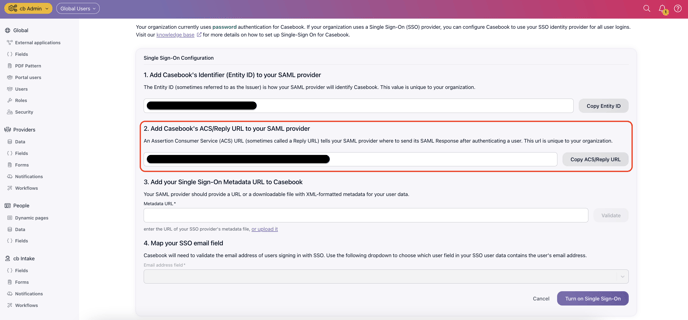
- Back in Okta, in the Single Sign On URL field, enter the Reply URL you copied previously from Casebook, as shown below. Select Save.
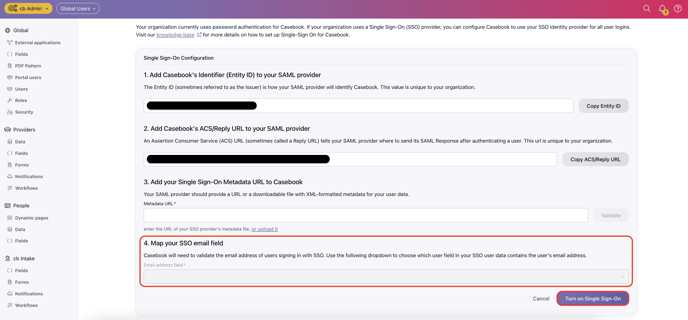
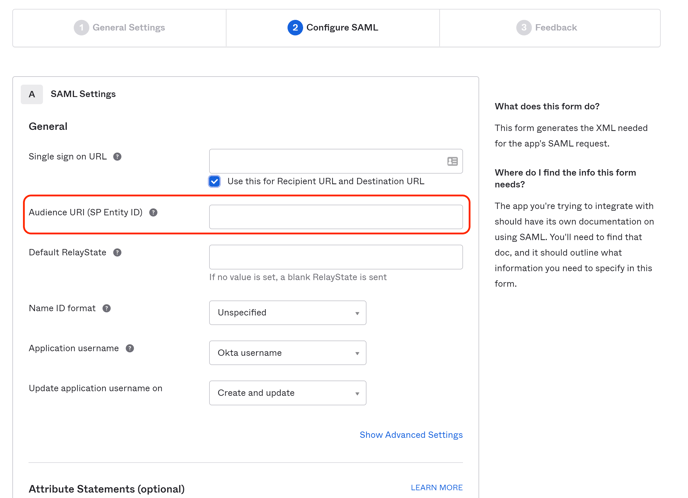
- In Casebook, copy the Identifier Entity ID under Step 1.
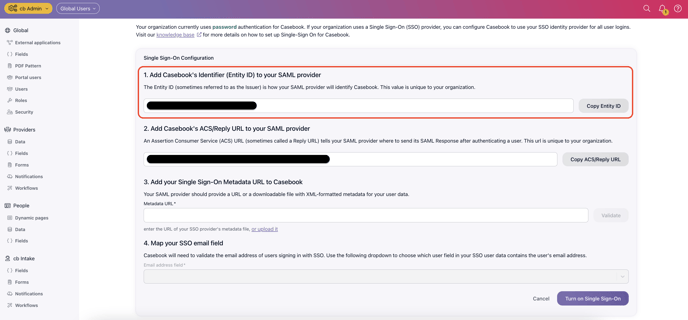
- Back in Okta, in the Audience URI (SP Entity ID) field, enter the Identifier Entity ID you copied previously from Casebook, as shown below. Select Save.
- Leave Default RelayState blank.
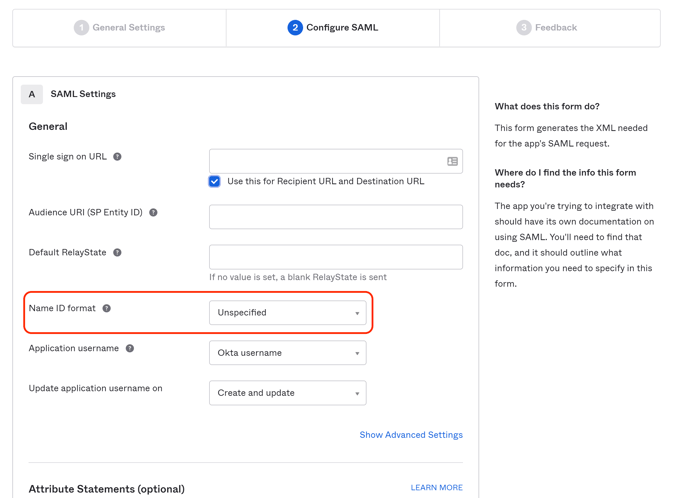
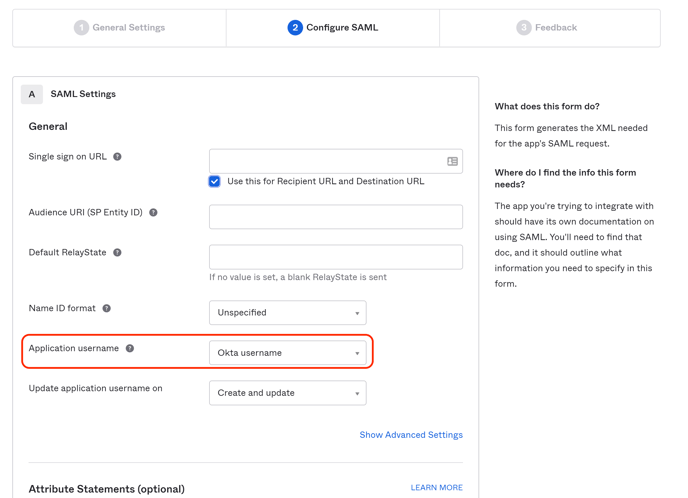
- Change the Name ID Format from Unspecified to EmailAddress.
- Change Application Username from Okta Username to Email.
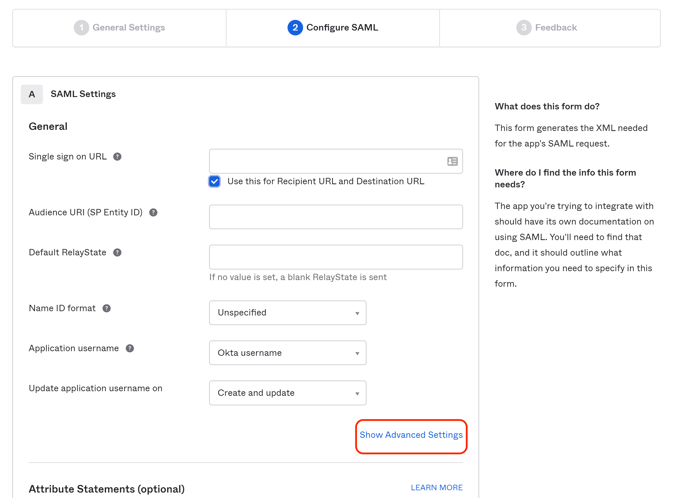
- Select Show Advanced Settings
- Change Assertion Signature to Unsigned.
- Leave all other settings as they are.
- Under the Attribute Statements section, add the following values:
- Name = email
- Name format = unspecified
- Value = user.email

- Select Next.
- On the next step (Feedback) select the following:
- I'm an Okta customer adding an internal app.
- This is an internal app that we've created.
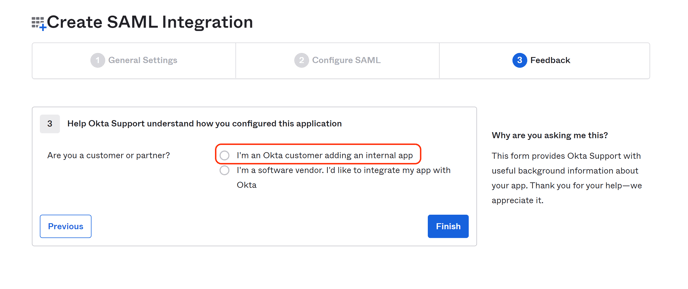
- Select Finish.
- Navigate to the Sign On tab.
- Under SAML Signing Certificates, select Actions in the SHA-2 row, select View IdP Metadata, as shown below.
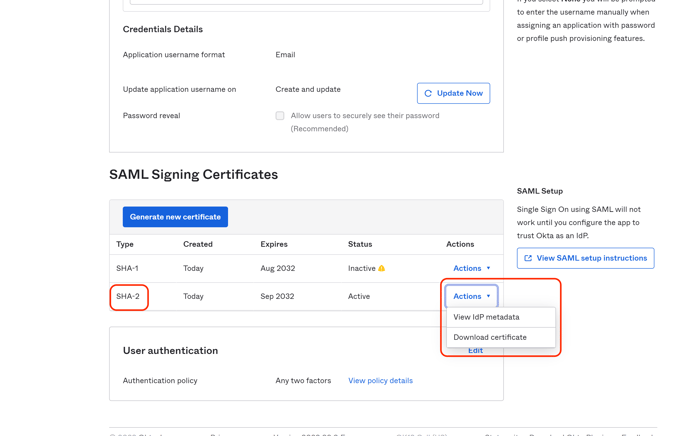
- Selecting View IdP Metadata will automatically open a new tab. Copy the URL (keep this handy for a later step) of the new tab.
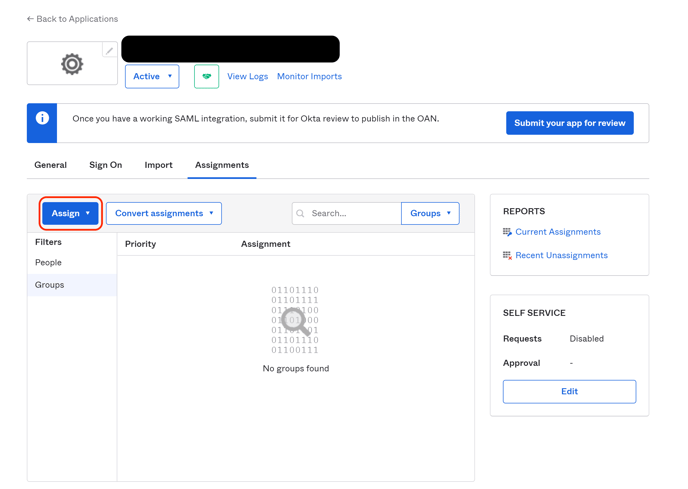
Step 2: Assign Users to Application
- Navigate to the Assignments tab.
- Select Assign to add Users or Groups.
Step 3: Add Metadata URL to Casebook
- Paste the Metadata URL (previously copied) into Step 3 Casebook Metadata.
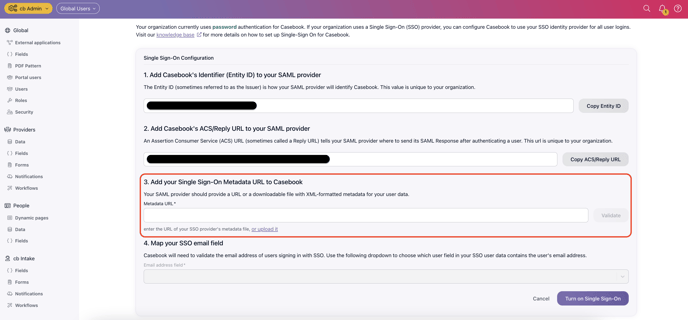
- Type "email" into Step 4 Map Your SSO Email Field in Casebook.
- Select Turn on Single Sign On.