Let's take a look at how to create a case record and add people, involvements, and roles in Engage.
In this article, we will explore the process of creating a case, adding individuals, and incorporating services into the case management system. We'll delve into the step-by-step procedure and explain various terms and options along the way. By the end, you'll have a clear understanding of how to utilize Engage to streamline your work efficiently.
Creating a Case:
To initiate a case, start by locating the plus button on the bottom right-hand corner of the page. Clicking on it will allow you to create a new case from scratch. Upon accessing the case details page, the first step is to provide a name for the case.
It's important to note that even though you name the case, you still need to add the person and create their profile separately. This ensures that demographic information is collected accurately.
Selecting Case Type:
Consider how you want to classify your cases. You can choose either a case type based on program or department participation; for example. These classifications allow you to bundle cases according to the way you want to report on cases. Determine the best approach for your organization and configure the case type accordingly.
Refining Case Types:
The level of specificity is customizable to your needs. Additionally, you can differentiate case types based on localities or counties, allowing for more precise reporting and analysis.
Status:
The system provides predefined status options, such as active and inactive, to manage the case workflow effectively. By assigning appropriate statuses, you can monitor and track the progress of each case. Consider how you want to track the status or lifecycle of a case and configure based on your organization’s needs.
Additionally, you can utilize a legacy case ID field or rename it to capture any other relevant identification information to a case.
Setting Overall Goals:
When creating a case, it is essential to establish overall goals. You can rename the "overall goals" field if desired, as it serves as a place to define the objectives you wish to achieve. You can either list specific goals or use this as a way to assess overall needs within the case.
Add Case Assignee:
When creating a case, you will want to assign the person responsible for this case here.
Note: When creating a new case, the user who initiates the case will automatically be added as an assignee, even if a different user is selected as the primary assignee. This means that the case creator and the designated primary assignee will both appear in the assignee list.
Example: If User A creates the case and assigns User B as the primary assignee, User B will appear as the primary, while User A will also be listed as a regular assignee.
Create the Case:
To create the case after completion of these fields, you will choose the create case button on the right side of the screen.

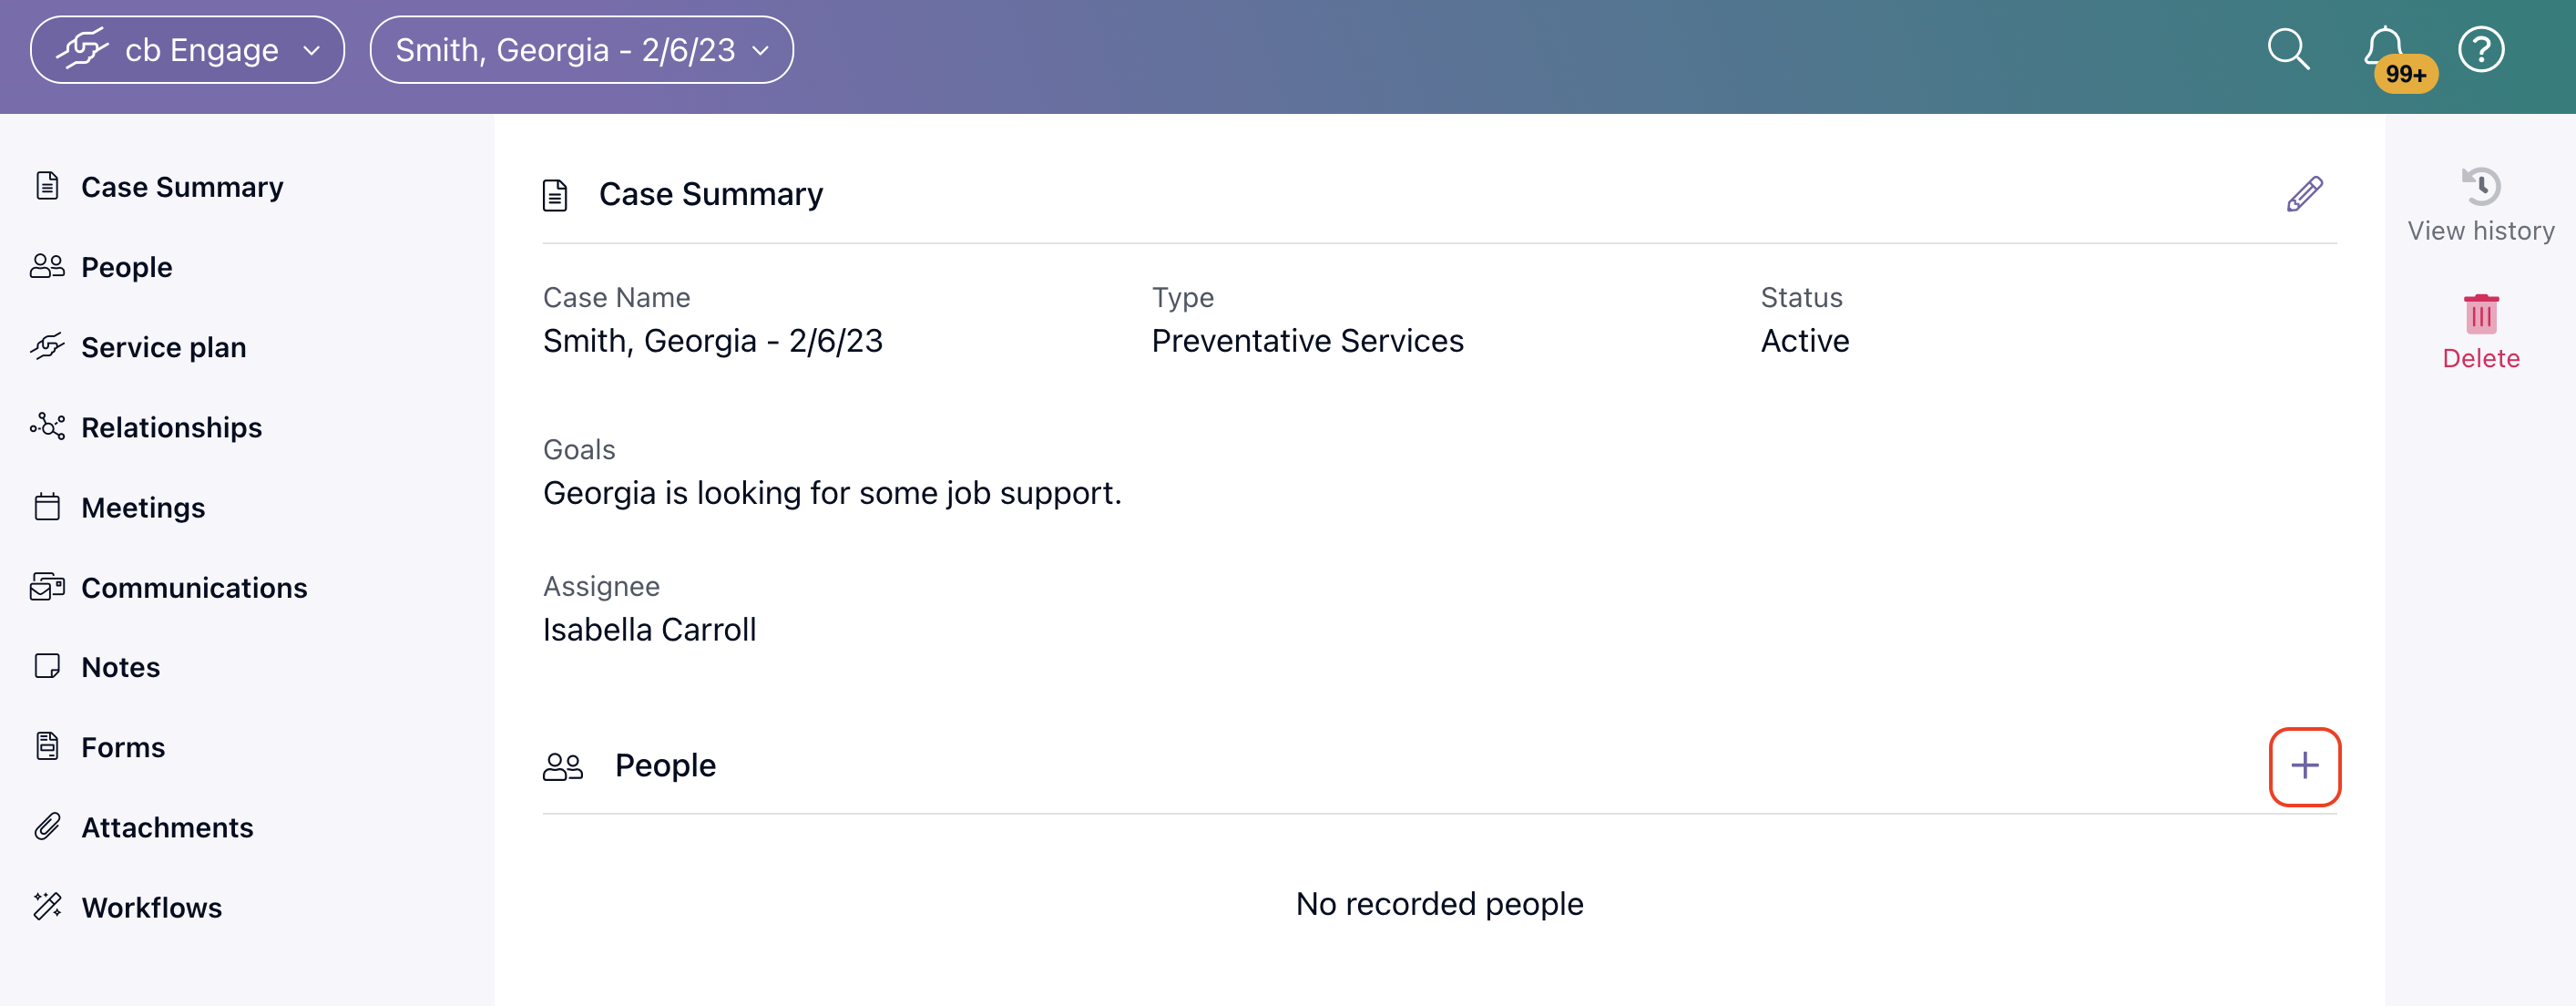
Adding People to Case:
To add individuals to a case, click on the plus button in the people section and search for the person's name. If the person already exists in the system, you can attach them to the case. Otherwise, you can create a new person profile.
The person card contains various fields for demographic information, some of which can be hidden if they are not relevant to your organization's workflow. You can also make certain fields required or add custom fields for collecting additional data.
To add a person to a case record, follow the steps below:
- Select the plus icon towards the right-hand side of the People section.
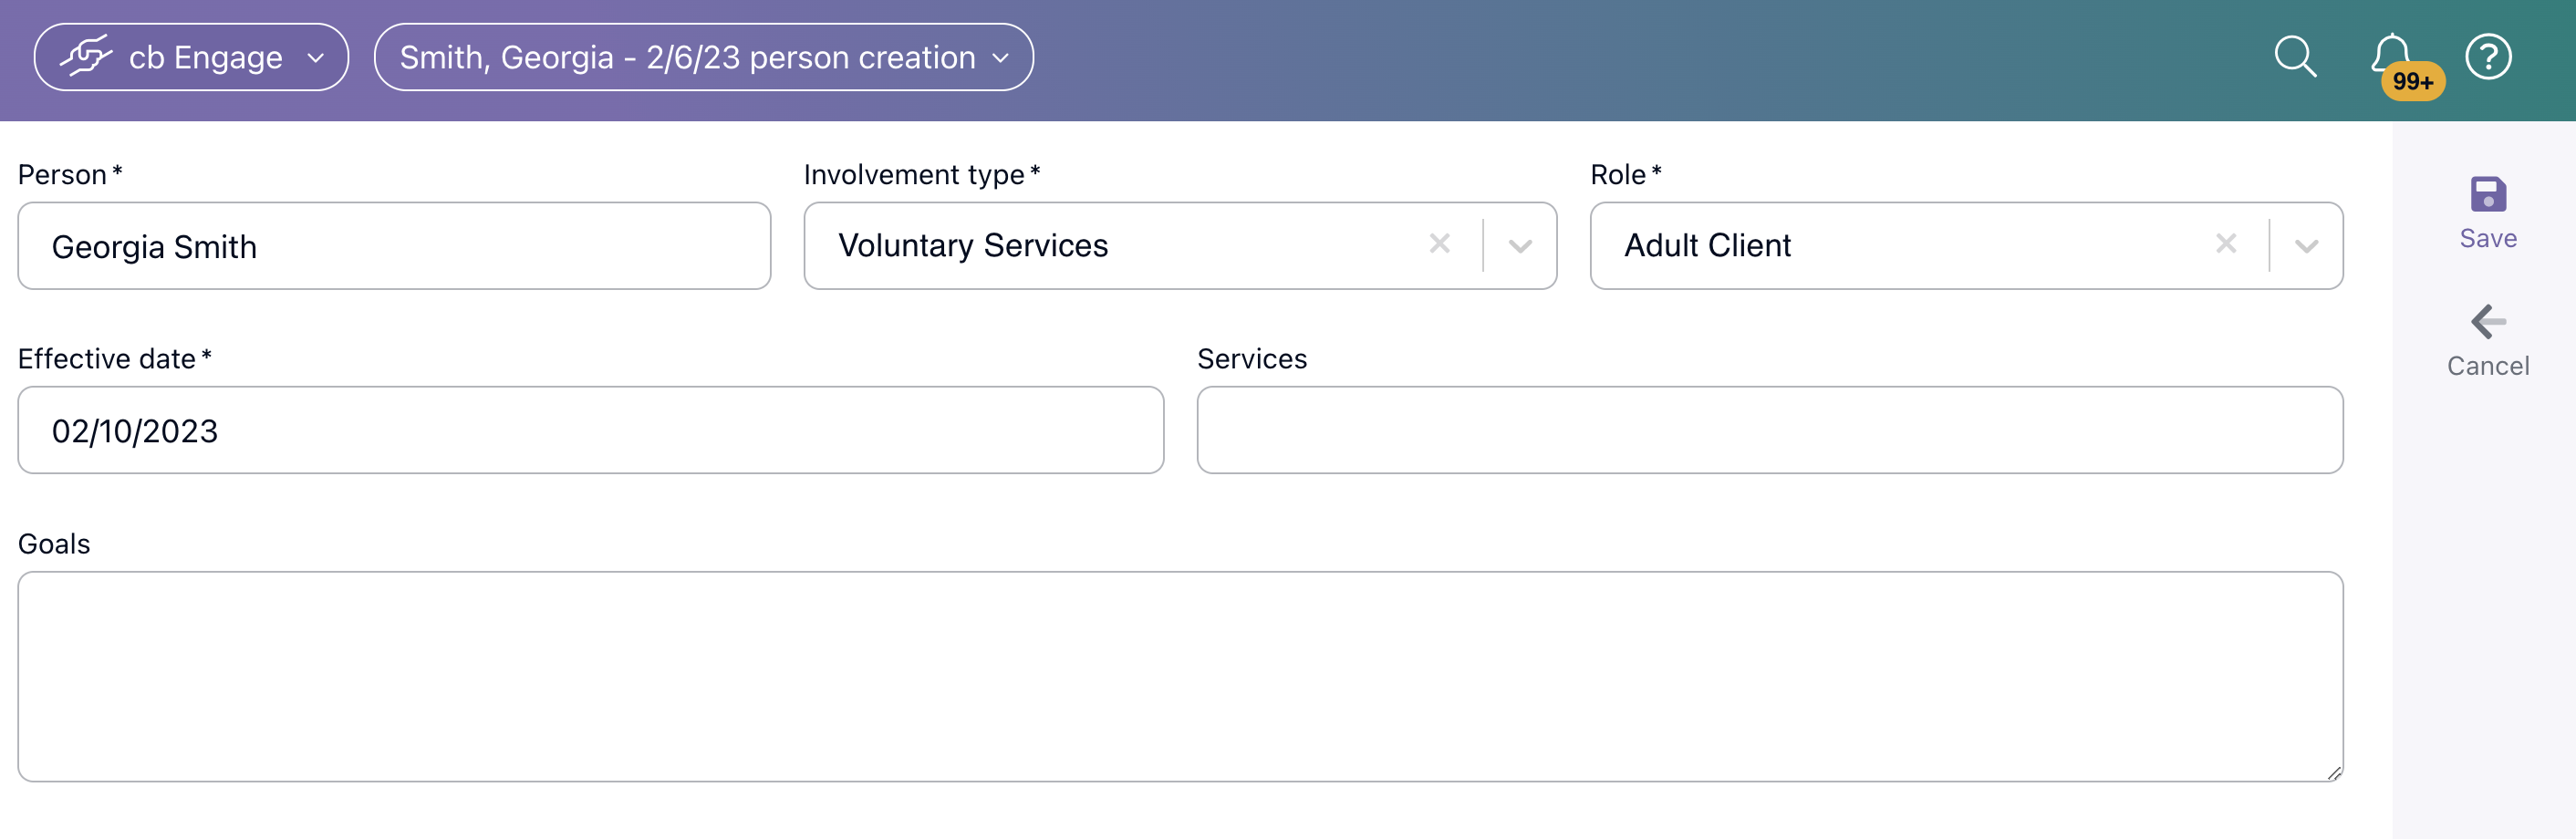
- Begin by entering the person's name into the Person field. Based on your entry, people will start to appear. If the person does not yet have a Person Profile in Casebook, you will need to create one by selecting Create New Person.
- Select the Involvement Type from the drop-down list. We recommend that you think of the Involvement Type field as a way to categorize clients by program-related information.
- Select the Role from the drop-down list. We recommend that you think of the Role field as how this client relates to the case they are being included on.
- Select the Effective Date from the date picker. This date will relate to when the Involvement Type began.
- Enter any person-specific goals for the case in the Goals section.
- Select Save from the right-hand action menu
Involvement Type:
The involvement type field allows you to track the length of time a person is associated with a particular program and their involvement with your organization. It serves as an overarching classification of the program and can be used to monitor program longevity, goals, and outcomes. You can add multiple involvement types for individuals involved in multiple programs simultaneously. This information is reportable and provides a comprehensive overview of each person's program participation.
Note: For instructions on how to edit/end involvements, please click here.
Roles:
The role field allows you to select the role that describes their relationship to the case.

Conclusion:
By following these steps, you can effectively create cases, add individuals, and incorporate program tracking and roles into your case management.
Note:
Remember to configure case types, case statuses, involvement types, and roles, refining them based on your organization's needs.
As you familiarize yourself with the process, you can further customize the system to suit your specific requirements.