Introduction
Forms are built and created in cb Admin using the Casebook form builder, powered by form.io.
There are 2 ways to create a form in Casebook
- From scratch - the focus of this article
- By inserting fields on top of a PDF document
If you’d like to edit a paper form you already have on file, check out Creating New Forms from PDFs to learn more.
Note: When filling out forms on mobile, there are slight differences you will notice than if you fill out forms on the web.
Note: You cannot make changes to a form while it is in the live stage.
Creating New Forms
- In Admin, under Global, click “Forms”
- Hover over
 the plus sign.
 - Click “Create new form.” You’ll also be given the option to create a new form from PDF. Review Creating New Forms from PDFs for more information.
- Under “Settings,” type in all the required information and any additional information you have into the text boxes.
Note: Required information is highlighted in green and has an asterisk. Optional information is not highlighted and has no asterisk.
Note: Users can click into the access rules without committing to adding them or not; changes save after you hit save button.- Title: This is the name of the form.
- Description: These are details about what the form is used for.
- Access: This is where you indicate if the form should be available to provider types, and license statuses.
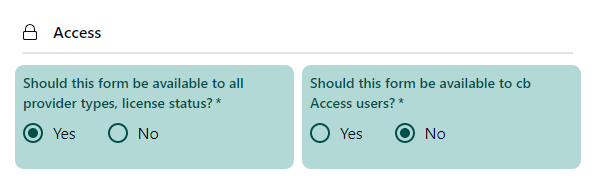
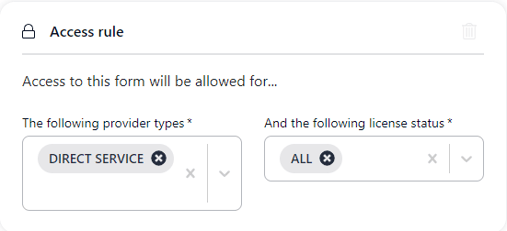
- If you say no, you will be asked to create an access rule for the form (i.e. which provider type(s) and which license statuses).
- If you say no, you will be asked to create an access rule for the form (i.e. which provider type(s) and which license statuses).
- Comments for this version: This can be any additional information you want to write down related to this version of the form.
Tip. You can identify forms that are available to all provider and license types or to a specific provider or license type. You can make forms available to cb Access users (applicants) as well.
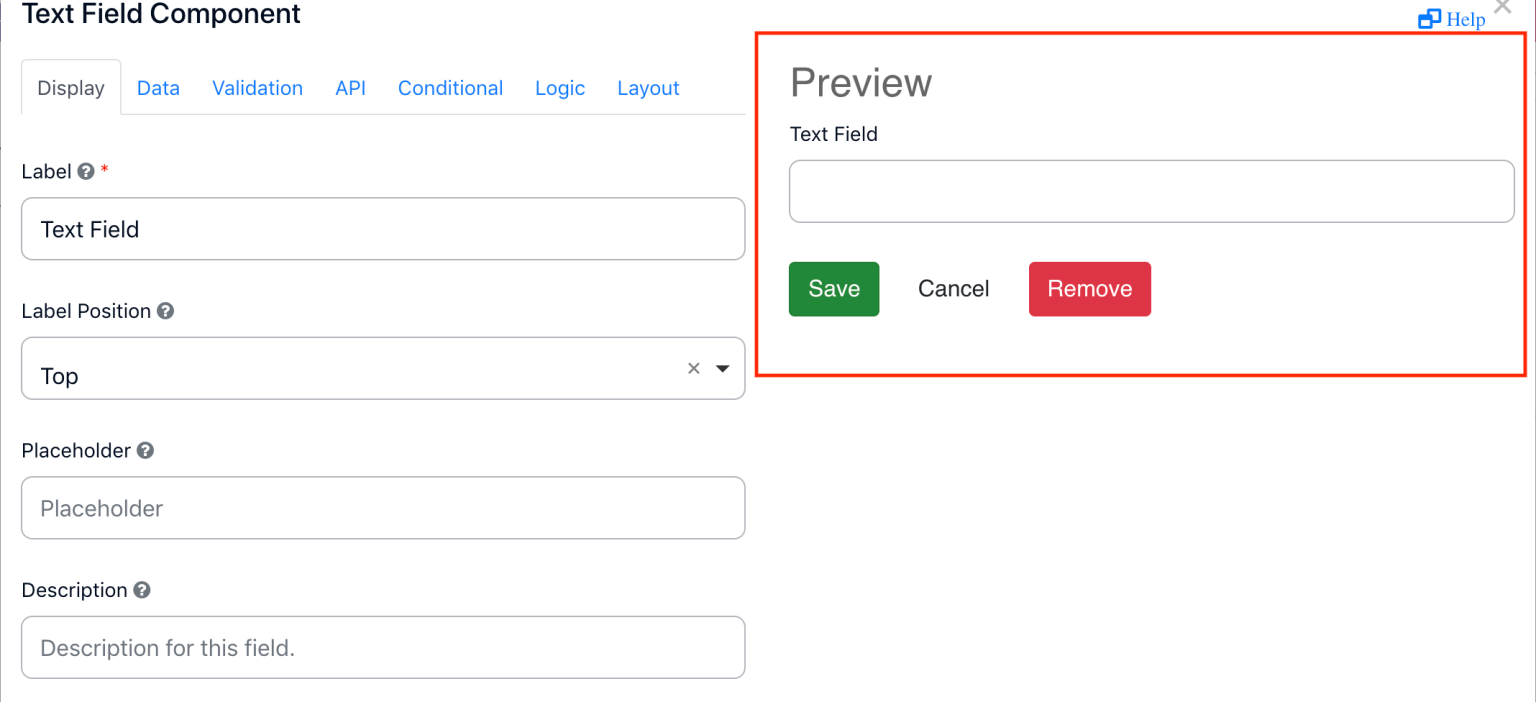
- Under “Form builder,” click, drag, and drop a component from the sidebar into the form space. (Check out Form Components for more information.)
- When the component’s window appears, fill in all the information for the form component. (Go to Form Component Customizations for more information.)
- Check how the form component will look in the preview section of the form components window.
- Click
 save to save this form component in the draft stage. (Review Publishing Forms and Deleting and Archiving Forms for more information about form stages.)
 - To preview how the form will look, click
 preview.
- To download the previewed form as a test to review how it will look as a PDF, click
 Download PDF.
 - Then click
 Edit to continue editing the form.
- To download the previewed form as a test to review how it will look as a PDF, click
- Click
 Move to in review to save this form into the review stage.
If you plan to use cb Reporting to gain insight into the data that you are collecting with forms, there are a couple of things to keep in mind.
Each Form Component must have a unique label. For example, you are unable to have two components that are labeled "First Name." As you are building your Forms in cb Admin, please be on the lookout for the error icons shown below. If you see these icons on any form component, please delete the components and then re-add a component with a unique label.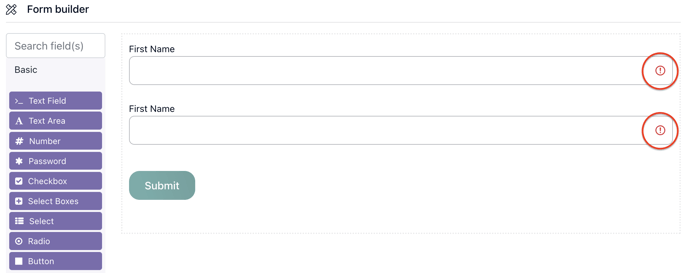
Note. The submit button is not available when building a form. The form builder has three stages draft, in review, and live. Once a form is in review, you are able to move it to live (published). See the video below.
Editing Existing Forms
- Click “Forms”
- Click the form you want to edit.
- Follow step 4 and onward in the Creating New Forms process above.
Note: Any data entered while previewing a form will not persist. You must be on a Case Record, Intake Report, Provider Record, or Person Profile to complete a form.